Recently, I decided to revisit this issue and came up with the following approach, which works well for me. I typed up what I did in case it can help anyone else. Let me know if I missed something or made any typos! 
Configuring Nextflow and AWS to Automatically Delete Old Nextflow Work Files
When a Nextflow pipeline is run, it uses a work folder where it stages and processes the files needed by each process defined in the pipeline. Over time, these work folders can become quite large as they contain full copies of the files used by the pipeline. Nextflow offers two options to deal with this. First, as described here, one can set cleanup = true in the config file so that all files associated with a run in the work directory will be deleted when the run completes successfully. Second, as described here, one can manually run nextflow clean to remove work files from previous executions. Unfortunately, neither of these options is currently supported when using Nextflow with Fusion, as the work folder is located in AWS S3.
One natural way to deal with this is to configure a Lifecycle rule in AWS that will periodically delete objects with a given tag. By default, as described here, Fusion is configured to tag all non-metadata work files with “nextflow.io/temporary=true”. When processed files are transferred from the Nextflow work folder to a results folder using the publishDir directive (described here), they keep their tags as-is. On its own, this would prevent the Lifecycle rule from being able to exclusively target Nextflow work files for removal. The publishDir directive has a “tags” option that one can use to update the tags when objects are published to a results folder. Unfortunately, two outstanding bugs prevent the above approach from helping. First, Fusion often fails to tag files in the work folder, preventing them from being targetable by Lifecycle rules. Second, when tags are specified with the publishDir directive, they aren’t applied to files in subfolders, so it’s not possible to reliably replace the tags applied by Fusion. Given these issues, the following approach was identified to selectively delete Nextflow work files in AWS.
Adjusting Your Nextflow Config to Make Use of the Following Setup
The following configuration is designed to tag *untagged* S3 objects that contain “nextflow_work” in their name/path. This requires two changes to the Nextflow defaults:
-
To make it easier to exclusively tag Nextflow work objects, change the Nextflow work folder from simply “work” to “nextflow_work” by adding workDir = nextflow_work to the nextflow.config file.
-
As mentioned above, Fusion is configured to tag all non-metadata work files in the Nextflow work folder with “nextflow.io/temporary=true”. To avoid replacing the tags on the metadata files, the Lambda function we configure below is designed to only tag untagged S3 objects in nextflow_work folders. To stop Fusion from tagging objects with “nextflow.io/temporary=true”, add fusion.tags = ‘[.command.*|.exitcode|.fusion.*](nextflow.io/metadata=true)’ to the nextflow.config file.
Configuring a Lambda Function in AWS to Tag Old Nextflow Work Files
AWS Lambda is a way to run custom code without having to manage the underlying infrastructure. Here, we will configure a Lambda function to tag old untagged Nextflow work files so that they can be targeted for deletion by Lifecycle rules.
Creating a Custom Role for the Lambda Function
First, it’s necessary to create a role that can be adopted by the Lambda function with the necessary permissions for it to tag objects in S3. Here are the steps to do this:
-
Navigate to the IAM portal in AWS and select “Roles” in the left-hand menu.
-
Select “Create role” at the top right of the page.
-
Under “Trusted entity type” select “AWS service”, and under “Service or use case” select “Lambda”. Select “Next”.
-
Under “Permissions policies”, search for “AWSLambdaBasicExecutionRole” and add it. This policy will allow the Lambda function to write to the CloudWatch Logs, which is helpful for tracking activity. Select “Next”.
-
Under “Role name,” enter a clear name for the role and select “Create role” in the bottom right corner of the page.
-
Search for the role you just created and select it.
-
Under “Permissions policies”, select “Create inline policy” from the “Add permissions” dropdown menu:
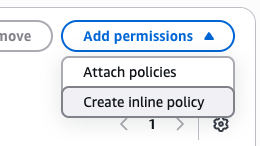
260×146 7.98 KB
-
Under “Policy editor”, select “JSON” and replace the text with:
{
    "Version": "2012-10-17",
    "Statement": [
        {
            "Sid": "S3TagList",
            "Effect": "Allow",
            "Action": [
                "s3:ListBucket"
            ],
            "Resource": [
                "arn:aws:s3:::*"
            ]
        },
        {
            "Sid": "S3TagReadWrite",
            "Effect": "Allow",
            "Action": [
                "s3:GetObjectTagging",
                "s3:PutObjectTagging"
            ],
            "Resource": [
                "arn:aws:s3:::*/*"
            ]
        }
    ]
}
This will allow the Lambda Function to tag objects in S3. Select “Next”.
-
Under “Policy name,” add a meaningful name and select “Create policy”.
-
Again, under “Permissions policies”, select “Create inline policy” from the “Add permissions” dropdown menu.
-
Under “Policy editor”, select “JSON” and replace the text with:
{
    "Version": "2012-10-17",
    "Statement": [
        {
            "Sid": "AllowCursorStateObjects",
            "Effect": "Allow",
            "Action": [
                "s3:GetObject",
                "s3:PutObject"
            ],

            "Resource": [
                "arn:aws:s3:::cursor_bucket/*"
            ]
        }
    ]
}
This will allow the Lambda Function to save and load objects in the S3 bucket specified under Resource (here: cursor_bucket). This is necessary so that the Lambda function can save “cursors” that help it track its progress in processing the objects in the buckets. Select “Next”. Note, the above two inline policies can be combined into one if you prefer.
Create a Lambda Function
-
Navigate to the Lambda portal in AWS and select “Functions” in the left-hand menu.
-
Select “Create function” in the top right corner of the page.
-
Under “Create function”, leave the default (Author from scratch) selected.
-
Under “Function name”, add a meaningful name.
-
Under “Runtime”, select “Python 3.12”.
-
Under “Architecture”, leave the default (x86_64) selected.
-
Expand “Change default execution role” and select “Use an existing role”. Under “Existing role”, search for the role you created above and select it.
-
Select “Create function” in the bottom right corner of the page.
-
Replace the code in the “lambda_function.py” script with the following:
import os
from datetime import datetime, timezone, timedelta
import boto3
from botocore.config import Config
from typing import Optional


# ---------- GLOBAL DEFAULTS ----------
DEFAULTS = {
   "root_prefix": "",                 # e.g., "projects/" or "" for whole bucket
   "search_substr": "nextflow_work",  # substring to look for anywhere in the key
   "age_days": 7,                     # tag only if >= N days old
   "max_ops_per_bucket": 20000,       # max number of objects that can be tagged per run
}


# Hard-coded targets (edit to suit). Any missing field inherits from DEFAULTS.
BUCKETS = [
   {"bucket": "your_nextflow_bucket"},
   # {"bucket": "second-bucket", "search_substr": "nextflow_work", "age_days": 14},
]


# Tuning knobs
PAGE_SIZE  = int(os.environ.get("PAGE_SIZE", "1000"))  # S3 list page size (<=1000)
SAFETY_MS  = int(os.environ.get("SAFETY_MS", "3000"))  # stop this many ms before Lambda Configuration timeout
TAG_KEY    = os.environ.get("TAG_KEY", "Lifecycle")
TAG_VALUE  = os.environ.get("TAG_VALUE", "purge-candidate")


# Bucket used to store per-bucket/prefix cursors
STATE_BUCKET = "cursor_bucket"


s3 = boto3.client(
   "s3",
   config=Config(
       retries={"max_attempts": 8, "mode": "standard"},
       connect_timeout=3,
       read_timeout=10,
   ),
)


# ---------- HELPER FUNCTIONS ----------


def _key_matches(key: str, needle: str) -> bool:
   return needle in key


def _is_old_enough(last_modified: datetime, age_days: int) -> bool:
   return (datetime.now(timezone.utc) - last_modified) >= timedelta(days=age_days)


def _has_any_tags(bucket: str, key: str) -> bool:
   resp = s3.get_object_tagging(Bucket=bucket, Key=key)
   return len(resp.get("TagSet", [])) > 0


def _put_single_tag(bucket: str, key: str):
   s3.put_object_tagging(
       Bucket=bucket,
       Key=key,
       Tagging={"TagSet": [{"Key": TAG_KEY, "Value": TAG_VALUE}]},
   )


# ---------- CURSOR STATE HELPERS ----------


def _cursor_key(bucket: str, prefix: str) -> str:
   """
   Build a state key that is unique per (bucket, prefix).
   We normalize the prefix a bit so we don't get weird paths.
   """
   safe_prefix = prefix.replace("/", "_") or "root"
   return f"tagger_state/{bucket}/{safe_prefix}/cursor.txt"


def load_cursor(bucket: str, prefix: str) -> Optional[str]:
   """
   Load the last-seen key for this (bucket, prefix) from STATE_BUCKET.
   Returns a string key or None.
   """
   key = _cursor_key(bucket, prefix)
   try:
       resp = s3.get_object(Bucket=STATE_BUCKET, Key=key)
       data = resp["Body"].read().decode("utf-8").strip()
       print({"bucket": bucket, "cursor_loaded": data})
       return data or None
   except s3.exceptions.NoSuchKey:
       print({"bucket": bucket, "cursor_loaded": None})
       return None
   except Exception as e:
       # On any error, just log and fall back to starting from the beginning.
       print({"bucket": bucket, "cursor_load_error": str(e)})
       return None


def save_cursor(bucket: str, prefix: str, cursor: Optional[str]):
   """
   Save the last-seen key (or clear it if cursor is None).
   """
   key = _cursor_key(bucket, prefix)
   body = (cursor or "").encode("utf-8")
   try:
       s3.put_object(Bucket=STATE_BUCKET, Key=key, Body=body)
       print({"bucket": bucket, "cursor_saved": cursor})
   except Exception as e:
       # Not fatal for the main work; just log the issue.
       print({"bucket": bucket, "cursor_save_error": str(e)})


# ---------- CORE LOGIC ----------


def process_bucket(cfg: dict, context):
   bucket        = cfg["bucket"]
   root_prefix   = cfg["root_prefix"]
   search_substr = cfg["search_substr"]
   age_days      = int(cfg["age_days"])
   max_ops       = int(cfg["max_ops_per_bucket"])


   print({"bucket": bucket, "stage": "process_bucket_start"})


   processed = tagged = skipped_young = skipped_tagged = skipped_nomatch = 0


   # Load where we left off, if anywhere.
   start_after = load_cursor(bucket, root_prefix)
   last_seen_key = None
   saw_any_contents = False


   paginator = s3.get_paginator("list_objects_v2")
   try:
       paginate_args = {
           "Bucket": bucket,
           "Prefix": root_prefix,
           "PaginationConfig": {"PageSize": PAGE_SIZE},
       }


       # Only use StartAfter when we have a real key; boto3 rejects None
       if start_after is not None:
           paginate_args["StartAfter"] = start_after


       page_iter = paginator.paginate(**paginate_args)


   except Exception as e:
       err = {
           "bucket": bucket,
           "error": f"list_failed: {e.__class__.__name__}: {e}",
       }
       print(err)
       return err


   for page in page_iter:
       if context.get_remaining_time_in_millis() <= SAFETY_MS:
           print({"bucket": bucket, "status": "breaking_page_loop_time_budget"})
           break


       contents = page.get("Contents", [])
       if not contents:
           continue


       saw_any_contents = True


       for obj in contents:
           if context.get_remaining_time_in_millis() <= SAFETY_MS:
               print({"bucket": bucket, "status": "breaking_obj_loop_time_budget"})
               break


           key = obj["Key"]
           last_seen_key = key
           processed += 1


           if not _key_matches(key, search_substr):
               skipped_nomatch += 1
               continue


           if not _is_old_enough(obj["LastModified"], age_days):
               skipped_young += 1
               continue


           try:
               if _has_any_tags(bucket, key):
                   skipped_tagged += 1
                   continue
               _put_single_tag(bucket, key)
               tagged += 1
           except Exception as e:
               # Log the failure and continue
               print({"bucket": bucket, "key": key, "tag_error": str(e)})


           if tagged % 50 == 0:
               print({"bucket": bucket, "progress": {"processed": processed, "tagged": tagged}})


           if tagged >= max_ops:
               print({"bucket": bucket, "status": "hit_max_ops", "tagged": tagged})
               break


       if tagged >= max_ops:
           break


   # ----- Cursor handling -----
   if last_seen_key:
       save_cursor(bucket, root_prefix, last_seen_key)
   else:
       # If we started with a cursor but saw no contents at all after StartAfter,
       # it likely means we were at the end of the keyspace. Reset to the beginning.
       if start_after is not None and not saw_any_contents:
           print({"bucket": bucket, "status": "no_contents_after_start_after_resetting_cursor"})
           save_cursor(bucket, root_prefix, None)


   result = {
       "bucket": bucket,
       "prefix": root_prefix,
       "needle": search_substr,
       "processed": processed,
       "tagged": tagged,
       "skipped": {
           "not_old_enough": skipped_young,
           "already_tagged": skipped_tagged,
           "no_match": skipped_nomatch,
       },
   }
   print({"summary": result})
   return result


# ---------- LAMBDA ENTRYPOINT ----------


def lambda_handler(event, context):
   print({"stage": "lambda_handler_start", "event": event})


   # Merge each entry with defaults
   targets = [{**DEFAULTS, **b} for b in BUCKETS]
   print({"stage": "targets_built", "targets": [t["bucket"] for t in targets]})


   summaries = []


   for bcfg in targets:
       remaining = context.get_remaining_time_in_millis()
       print({"stage": "before_process_bucket", "bucket": bcfg["bucket"], "remaining_ms": remaining})


       if remaining <= SAFETY_MS:
           print({"status": "stopping_early_time_budget", "remaining_ms": remaining})
           break


       try:
           result = process_bucket(bcfg, context)
           summaries.append(result)
       except Exception as e:
           err = {
               "bucket": bcfg["bucket"],
               "error": f"unhandled: {e.__class__.__name__}: {e}",
           }
           print(err)
           summaries.append(err)


   print({"stage": "lambda_handler_end", "summaries_count": len(summaries)})
   return {"per_bucket": summaries}
In summary, this script will search for keys (i.e., AWS objects) that contain the substring “nextflow_work” in all buckets in the BUCKETS list and tag them with Lifecycle = purge-candidate if they are untagged and at least age_days (here, 7) old. The root_prefix option allows you to restrict which folders will be searched for keys containing “nextflow_work”. The STATE_BUCKET sets where the cursors will be saved/loaded in S3. Cursors save the last S3 object that was processed by the Lambda function so that the next time the function runs, it will resume from that point. This is necessary because Lambda functions can only run for up to 15 minutes, and that isn’t enough time to process all objects in buckets with many files. Without cursors, the function would always restart from the first object in the bucket (in lexicographic order).
-
Select the “Configuration” tab and select “General configuration” in the resulting menu.

549×154 10.9 KB
-
Select “Edit” and under “Timeout” set 15 min and 0 sec:

-
Select “Save”.
-
Return to the “Code” tab and select “Deploy”.
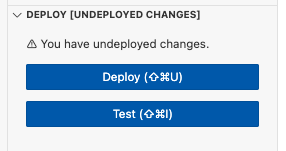
286×151 5.63 KB
Configuring an EventBridge Schedule to Run the Lambda Function
On its own, the above Lambda Function won’t do anything and needs to be triggered periodically. This is where the EventBridge comes in. Among other things, EventBridge allows one to configure schedulers that will run Lambda functions on a custom interval.
Creating a Custom Role for EventBridge
First, it’s necessary to create a role that can be adopted by the EventBridge schedule that will allow it to invoke the above Lambda function. Here are the steps to do this:
-
Navigate to the IAM portal in AWS and select “Roles” in the left-hand menu.
-
Select “Create role” at the top right of the page.
-
Under “Trusted entity type,” select “Custom trust policy” and replace the “Custom trust policy” with:
{
  "Version": "2012-10-17",
  "Statement": [
    {
      "Effect": "Allow",
      "Principal": { "Service": "scheduler.amazonaws.com" },
      "Action": "sts:AssumeRole"
    }
  ]
}
Select “Next”.
-
Don’t add any permissions and select “Next” again.
-
Under “Role name,” enter a meaningful name and select “Create role” in the bottom right corner of the page.
-
Search for the role you just created and select it.
-
Under “Permissions policies”, select “Create inline policy” from the “Add permissions” dropdown menu:
260×146 7.98 KB
-
Under “Policy editor”, select “JSON” and replace the text with:
{
    "Version": "2012-10-17",
    "Statement": [
        {
            "Sid": "InvokeAnyLambdaAnywhere",
            "Effect": "Allow",
            "Action": "lambda:InvokeFunction",
            "Resource": "arn:aws:lambda:*:*:function:*"
        }
    ]
}
This will allow the EventBridge scheduler to invoke any Lambda function. Select “Next”.
- Under “Policy name” enter a meaningful name and select “Create policy” in the bottom right corner of the page.
Create an EventBridge Schedule
-
Navigate to the Amazon EventBridge portal in AWS and select “Schedules” in the left-hand menu.
-
Under “Schedule name,” enter a clear name for the schedule.
-
Leave “default” for “Schedule group”.
-
Under “Schedule pattern”, choose a schedule that meets your needs. I chose a “Recurring schedule” with a “Cron-based schedule” like this:

950×358 35.4 KB
This “Cron expression” has the schedule run every day at 6 AM.
-
Under “Flexible time window,” select “Off” and select Next.
-
Under “Select target,” choose “AWS Lambda”:

-
Under “Lambda function,” select the Lambda function that was created above and select “Next”.
-
Under “Action after schedule completion,” select “NONE”.
-
Under “Execution role,” select “Use existing role” and choose the EventBridge role you created above. Select “Next”.
-
Select “Create schedule” in the bottom right corner of the page.
Configuring Lifecycle Rules to Delete Nextflow Work Files
AWS S3 offers Lifecycle rules, which can define actions you want Amazon S3 to take during an object’s lifetime, such as transitioning objects to another storage class, archiving them, or deleting them after a specified period of time. Here, we will set up Lifecycle Rules that will delete objects that were tagged by the Lambda function.
Configuring a Lifecycle Rule
-
Navigate to the S3 portal in AWS and select the bucket where you are running Nextflow.
-
Select the “Management” tab:

-
Under “Lifecycle rules,” select “Create lifecycle rule”.
-
Under “Lifecycle rule name,” enter a clear name.
-
(Optionally) enter a Prefix to limit the scope of the rule.
-
Under “Object tags,” select “Add tag”.
-
If you used the Python code without modifying the TAG_KEY and TAG_VALUE variables in the Lambda function, under “Key” enter “Lifecycle” and under “Value - optional” enter “purge-candidate”.
-
Under “Lifecycle rule actions,” check “Expire current versions of objects”. Note, if you use versioning in your bucket, you’ll likely also want to select “Permanently delete noncurrent versions of objects”.
-
Under “Days after object creation,” enter 1 and select “Create rule” in the bottom right corner of the page.
